The Ultimate Guide to Garage Door Sensor Alignment
When Your Garage Door Won’t Close: What You Need to Know About Sensor Alignment
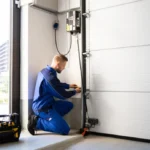
A garage door alignment sensor is a small safety device mounted near the base of your garage door that sends an invisible infrared beam across the opening. If that beam is broken or misaligned, your door will refuse to close — or will reverse the moment it starts to move.
Here’s how to fix a misaligned garage door sensor in 60 seconds:
- Check for any object blocking the beam path between the two sensors
- Look at the LED lights — the receiving sensor’s green light should be solid, not blinking
- Loosen the wing nut on the receiving sensor (green LED side)
- Slowly pivot the sensor until the green light glows steady
- Tighten the wing nut and test the door
If your lights are both off, or solid lights still won’t hold, keep reading — there’s likely a wiring or environmental issue at play.
Sensor problems are the most common reason garage doors stop working, and the good news is that most fixes take under 10 minutes. Since 1993, federal safety standards (UL 325) have required these sensors on all automatic openers — and for good reason. A standard residential garage door weighs between 130 and 250 pounds. Without working sensors, that’s a serious hazard.
I’m Andrew Hopson with Matrix Garage Doors, and our team has diagnosed and repaired hundreds of sensor alignment issues across Columbus, OH — from simple bracket adjustments to full garage door alignment sensor replacements caused by wiring damage or sun interference. This guide covers everything you need to go from a blinking sensor light to a fully working door.

Essential garage door alignment sensor terms:
- do garage door openers need to be serviced
- garage door keypad not working
- garage door remote battery
Understanding Your Garage Door Alignment Sensor and How It Works
To fix a problem, it helps to understand how the system works. Your garage door safety system relies on a pair of photo-eye sensors mounted on opposite sides of your garage door track. One sensor is the transmitter (or sender), and the other is the receiver.
The transmitter emits an invisible, continuous infrared light beam across the threshold of your garage. The receiver captures this light. As long as the receiver “sees” the beam, the garage door opener’s logic board knows the path is clear, allowing the door to close smoothly.
If anything — a child, a pet, a stray rake, or even a cloud of dust — breaks that beam while the door is closing, the receiver instantly loses the signal. The system interprets this as an emergency obstruction, immediately halting the downward motion and reversing the door back to the fully open position.
When the sensors themselves drift out of alignment, the receiver can no longer see the beam, even if the pathway is completely empty. The system assumes an obstruction is present, leaving you with a door that refuses to shut. For a deeper look into how these safety eyes protect your home, you can read our guide on Stop the Reversal: A Guide to New Garage Door Sensors.
To learn more about the physical alignment specs straight from the manufacturer, check out the official Garage Door Safety Sensors | How to Align documentation.
How to Identify a Misaligned Garage Door Alignment Sensor
When your safety eyes are out of whack, your garage door opener will usually try to tell you exactly what is wrong. Instead of guessing, look for these key diagnostic indicators:
- The Reversal Reflex: The door starts to close, travels a few inches or halfway down, and then immediately reverses.
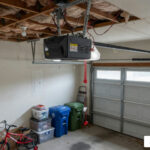
- The Blinking Overhead Light: On most standard openers (like Chamberlain, LiftMaster, or Craftsman), the main overhead light bulb will flash rapidly 10 times when the door reverses due to a sensor issue.
- The Wall Button Workaround: You can only get the door to close by standing inside the garage and continuously holding down the wall-mounted button until the door fully touches the floor. (This is a manual override feature, but it is highly inconvenient and indicates your sensors are failing).
- The Flashing LED: One or both of the small indicator lights on the sensors themselves are blinking, dim, or completely dark.
If you are experiencing these issues, you can read more about troubleshooting steps in our article Garage Door Not Closing.
To make diagnosing your garage door alignment sensor easier, use this quick reference table to compare normal versus misaligned LED patterns:
| Sensor Type | LED Color | Normal Status (Aligned) | Misaligned / Obstructed Status | Power / Wiring Issue Status |
|---|---|---|---|---|
| Sending Sensor | Amber / Yellow | Solid On | Solid On (Usually remains lit if powered) | Completely Off or Flickering |
| Receiving Sensor | Green | Solid On | Blinking / Flashing | Completely Off or Flickering |
Sending vs Receiving: Locating the Right Garage Door Alignment Sensor
Before you start twisting brackets and loosening screws, you need to know which sensor is which. Adjusting the wrong side can turn a simple five-minute fix into a frustrating game of trial and error.
- The Sending Sensor (Transmitter): This sensor features an amber or yellow LED. Its job is simply to project the infrared beam. Because it does not have to “listen” for a signal, its light will almost always remain solid as long as it has power, even if the sensors are pointing away from each other.
- The Receiving Sensor (Receiver): This sensor features a green LED. It is the sensitive “eye” of the operation. If the green light is blinking or completely off, this is the side that is failing to receive the beam. This is the sensor you will usually need to adjust.
For a visual demonstration of how to locate and adjust these safety eyes, you can watch this helpful video: Garage Door Won’t Close – Align Garage Door Safety Eyes – YouTube.
That while safety eyes align horizontally across your floor, modern smart garage setups use different types of sensors to monitor your door. For example, the Aladdin Connect® Door Position Sensor | 39279R – The Genie Company is a wireless position sensor mounted on the top panel of your door that uses an internal gyroscope to detect whether the door is open or closed, rather than using an infrared beam.
Step-by-Step Guide to Aligning Your Garage Door Sensors

Realigning your sensors is a straightforward DIY task, but safety must always come first. Before you begin, take the following safety precautions:
- Disconnect the Power: Unplug the garage door opener motor from the ceiling outlet, or flip the circuit breaker serving your garage. This prevents the door from accidentally activating while your hands are near the tracks.
- Wear Protective Gear: Use safety glasses to protect your eyes from falling dirt or rust, and wear Class 0 insulated gloves if you are handling exposed wiring.
- Observe the 6-Inch Rule: Under federal safety standards, garage door safety sensors must be mounted no higher than 6 inches (15 cm) above the garage floor. If they are mounted higher, they may fail to detect low-profile obstacles, such as a pet lying down or a small child.
Preparing Your Tools and Safety Gear
You don’t need a heavy duty toolbelt for this job. Gather these basic household items before you start:
- A tape measure (to check the 6-inch height rule)
- A screwdriver (flathead or Phillips, depending on your bracket screws)
- A soft microfiber cloth (to clean dirty lenses)
- A spool of household string
- A small spirit level (bubble level)
If you’re performing general maintenance on your door, check out The Ultimate Guide to Fixing a Stuck or Noisy Garage Door to keep your entire system running quietly and smoothly.
The String-and-Level Alignment Method
If your brackets have been bumped by a recycling bin or a lawnmower, they may look straight to the naked eye but still be misaligned by a fraction of an inch. Here is our foolproof method to get them perfectly level:
- Clean the Lenses: Use your damp microfiber cloth to gently wipe away any dust, cobwebs, or mud from the photo-eye lenses on both sensors.
- Measure the Height: Use your tape measure to confirm that both the sending and receiving sensors are mounted at the exact same height from the garage floor (ideally between 4 and 6 inches).
- Tie the String: Tie a piece of household string tightly around the center of the sending sensor’s housing. Stretch the string across the garage opening and tie it to the center of the receiving sensor.
- Check the Level: Place your spirit level on top of the taut string. If the bubble isn’t centered, your brackets are not on the same horizontal plane.
- Adjust the Brackets: Loosen the wing nuts or mounting screws on the brackets. Slide the brackets up or down along the track until the string is perfectly level.
- Aim and Tighten: Point the lenses directly at each other. Once the string is level and the sensors are aimed face-to-face, tighten the wing nuts firmly with your fingers. Do not over-tighten with a wrench, as this can crack the plastic sensor housing.
- Restore Power: Plug the opener back in and look at the LEDs. Both the amber and green lights should now glow steadily.
Testing the Safety Reversal System
Never assume the job is done just because the lights are solid. You must test the safety reversal system to ensure it is actually functioning:
- Open your garage door fully.
- Place a solid object, such as a 2×4 wood block laid flat, on the garage floor directly in the path of the door.
- Press your wall button or remote to close the door.
- The moment the door makes contact with the 2×4 block, it must immediately stop and reverse back to the open position.
If the door does not reverse, immediately disconnect the opener and call us. Testing this system should be part of your regular monthly home maintenance routine.
Troubleshooting Recurring Sensor Alignment Failures
Do your sensor lights stay solid for a day or two, only to start blinking again next week? Recurring alignment failure is incredibly frustrating, but it is rarely caused by “ghosts.” Instead, it is usually a physical issue with your garage door tracks or brackets.
- Vibration and Track Flex: When your garage door opens and closes, the heavy steel sections create intense vibrations. If your mounting brackets are loose, or if your tracks flex too much during operation, this movement will slowly shake the sensors out of alignment.
- Loose Brackets: Check the screws holding the brackets to the wall or track. If they wiggle when you touch them, tighten them up.
- The “Bump” Factor: If your sensors are mounted in a high-traffic area where they regularly get bumped by trash cans, bicycles, or garden tools, consider installing protective metal brackets or re-routing your storage layout.
To dive deeper into fixing shaky brackets and track vibration, read the troubleshooting guide on Garage Door Sensor Alignment Keeps Failing: Loose Brackets, Vibration, and Wiring Fixes – Garage Opener Fix.
Environmental Factors: Sunlight and Temperature Shifts
Sometimes, your hardware is perfectly fine, but mother nature interferes.
- Sunlight Interference (Photodiode Saturation): This is a very common issue in Central Ohio during the spring and summer months. If your garage door faces east or west, the low angle of the morning or late afternoon sun can shine directly into the receiving sensor’s lens. This bright ambient infrared light completely saturates the receiver, blinding it. The sensor cannot “see” the transmitter’s beam through the glare, and the door reverses.
- The Sunlight Fix: You can easily fix this by swapping the physical positions of the sending and receiving sensors (putting the receiver on the side of the door that gets less direct sunlight). Alternatively, you can slide a small 3-inch piece of cardboard tube (like an empty toilet paper roll) over the receiving sensor to act as a sun shield, or purchase commercial plastic sun visors.
- Temperature Shifts: Extreme cold in winter or heavy humidity in summer can cause condensation, frost, or dew to build up on the lenses, blocking the beam. Regularly wiping down your lenses during seasonal shifts will prevent this.
If your door is acting up due to extreme weather or alignment shifts and won’t budge, read our helpful guide on what to do when your Garage Door Stuck Closed.
Wiring and Power Issues
If your sensor LEDs are completely dark or flickering erratically even when you hold them perfectly still, you are likely dealing with a wiring or power delivery problem.
- Check the Connections: Inspect the small bell wires running from the back of each sensor up to the opener motor overhead. Look for loose wire nuts or disconnected terminals at the back of the motor.
- Look for Physical Damage: Rodents love to chew on thin garage door wires. Check the entire length of the wire for bite marks, frayed insulation, or sharp bends where staple fasteners may have pinched the copper core.
- Corrosion: In damp Ohio garages, moisture can cause corrosion at the wire splice points near the floor. Cut away any corroded copper, strip the wires back to clean metal, and twist them back together using fresh wire nuts.
Frequently Asked Questions About Garage Door Sensors
Why does my garage door close halfway and then reverse?
This is almost always caused by track vibration or a loose bracket. As the door travels down the tracks, the vibration shakes the misaligned sensors just enough to temporarily break the infrared beam pathway. Once the beam is interrupted for even a millisecond, the door reverses. Tightening your brackets and ensuring the sensors are centered in their mounts will solve this.
Can I bypass my garage door safety sensors?
You can temporarily bypass your sensors by standing inside your garage and holding down the wall-mounted button continuously until the door is completely closed. However, you cannot permanently bypass or disable the safety sensors. Doing so violates federal safety laws, puts your family and pets at extreme risk of injury, and can damage your garage door opener’s logic board.
How long do garage door sensors typically last?
Quality garage door sensors typically last 10 to 15 years. Over time, the internal infrared diodes can weaken, or the plastic outer lenses can become permanently clouded and yellowed from UV exposure. If your sensor LEDs refuse to light up even though you have confirmed that the wiring is carrying power, it is time to replace them.
Conclusion
Aligning your garage door alignment sensor is a quick, rewarding DIY project that can save you the time and expense of an unnecessary service call. By keeping your lenses clean, your brackets tight, and your sensors level, you can ensure your garage door operates safely and reliably all year round.
However, if you have tried aligning your sensors and the green light still blinks, if your wiring is severely damaged, or if you suspect your opener’s logic board is failing, don’t risk your safety.
At Matrix Garage Doors, we are a family-owned company based right here in Columbus, OH. We provide 24/7 emergency residential garage door repair, maintenance, and professional alignment services across the entire Columbus metro area — including Dublin, Westerville, Hilliard, Grove City, Upper Arlington, New Albany, Pickerington, and all surrounding suburbs.
If you need a hand getting your garage door back on track, check out our Garage Door Repair in Columbus OH page or contact us today to Schedule a Professional Garage Door Opener Installation. We are always here to help keep your home safe and secure!