Don’t Get Bent Out of Shape Adjusting Your Garage Door Arm
Why Getting Your Garage Door Opener Arm Adjustment Right Can Save You Hundreds
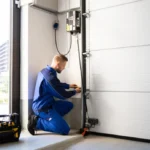
Garage door opener arm adjustment is the process of changing the angle and length of the J-arm (also called a drawbar) that connects your opener’s trolley to the door itself. Here’s a quick answer to the most common questions:
How to adjust your garage door opener arm:
- Disconnect power and pull the emergency release cord
- Check the arm angle with the door fully closed — it should angle slightly upward from the door bracket to the trolley
- Adjust arm length by selecting different bolt holes in the two-piece drawbar
- Reposition the door bracket or header bracket if the angle is too steep or too shallow
- Reconnect power and reset travel limits and force settings
- Test the safety reversal system
A small metal arm does a big job. Every time your garage door opens and closes, that arm translates the opener motor’s horizontal pulling force into the vertical lifting motion that moves the door. When the angle is off — even slightly — the whole system pays the price.
The symptoms are easy to miss at first: a groan here, a shudder there. But an incorrect arm angle is responsible for roughly 30% of garage door opener failures, and it puts real stress on your door panels, your rail, and your motor.
The good news? In many cases, this is a fixable problem — if you know what to look for.
I’m Andrew Hopson from Matrix Garage Doors, and through years of hands-on garage door opener arm adjustment work across the Columbus, Ohio area, I’ve seen this one overlooked component cause thousands of dollars in preventable damage. In the sections below, I’ll walk you through exactly how to diagnose and fix it safely.

Basic garage door opener arm adjustment terms:
Why the Angle of Your Garage Door Arm Matters

When it comes to your garage door’s mechanics, geometry is everything. The J-arm (or drawbar) acts as a mechanical lever. If the arm is mounted at the wrong angle, the physics of force translation fail. Instead of pulling the door smoothly along its tracks, the motor ends up pushing directly against the door structure or pulling the rail out of alignment.
According to industry data, a properly adjusted garage door opener arm can extend the lifespan of your opener motor by up to 50%. Conversely, an incorrect arm angle is responsible for approximately 30% of garage door opener failures. When the angle is wrong, you risk panel buckling (especially on non-reinforced steel doors), rail bowing, and severe motor strain.
For a deeper dive into the physics of how these angles interact, you can read Fix It In The Home’s guide on garage door arm angles.
To help visualize how the angle affects your entire system, we have compiled this comparative table:
| Arm Angle Category | Angle Description | Primary Mechanics & Force Translation | Common Risks & Consequences |
|---|---|---|---|
| Too Steep | Close to 90 degrees (nearly vertical) when closed. | Motor pushes straight down on the door panel instead of pushing it backward. | Buckled top panels, creased steel, bent rails, and catastrophic motor failure. |
| Too Shallow | Nearly flat or horizontal when closed. | Motor has to pull with extreme horizontal force just to initiate vertical lift. | Jerky starts, motor groaning, binding at the top of travel, and spontaneous safety reversals. |
| Optimal | Angled slightly upward from the door bracket to the trolley (approx. 45 degrees). | Balanced translation of horizontal force into upward and backward movement. | Smooth, quiet operation, maximum motor lifespan, and minimal wear on parts. |
Why Proper Garage Door Opener Arm Adjustment Prevents Rail Bowing
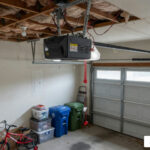
Have you ever watched your garage door close and noticed the overhead metal rail flex or bow upward right at the end of the cycle? This rail bowing is a classic symptom of poor J-arm geometry.
When the arm is too short or too vertical, the geometry changes the way spring force acts on the system. As the door reaches the fully closed position, the springs are under peak tension. If the arm angle is too steep, that upward spring force transfers directly into the opener rail instead of maintaining steady downward pressure on the door. Combined with a multi-piece rail (which inherently flexes more than a solid, single-piece rail), this causes the track to bow upward.
By ensuring proper garage door opener arm adjustment, you maintain the correct trolley clearance and force distribution. This simple mechanical correction is a crucial part of routine garage door maintenance that keeps your system running smoothly and safely.
Diagnosing Incorrect Arm Angles: Steep vs. Shallow
You don’t need a degree in mechanical engineering to diagnose an incorrect arm angle. By performing three simple visual tests, you can pinpoint exactly where your geometry is failing.
- The Fully Closed Position Test: With the door fully closed, look at the J-arm. Is it pointing almost straight down (vertical)? If so, the angle is too steep. This causes the opener to slam the door into the floor, leading to visible panel creasing and immense motor strain. If the arm is nearly horizontal, the angle is too shallow, meaning the motor will struggle to pull the door up from its resting position.
- The Peak Radius Point Check: Disconnect your opener and manually lift the door until the top edge of the top panel is level with the bottom of the curved track section. At this “peak radius point,” check the trolley. The trolley should be positioned several inches past the straight arm’s connection point. If it isn’t, your arm length is incorrect, which will cause binding.
- The Fully Open Position Test: Open the door completely. The arm should maintain a slight angle and should never press flat against the rail or the motor unit itself.
If your door exhibits jerky movement, a loud banging noise when starting to open, or a spontaneous reversal where it hits the floor and immediately pops back up, your arm angle is likely the culprit.
Step-by-Step Guide to Garage Door Opener Arm Adjustment
Adjusting your garage door arm is a straightforward mechanical process, but it requires precision. The J-arm assembly consists of two parts: a straight arm and a curved arm. By sliding these two pieces together or apart and securing them through different bolt holes, you can customize the overall length and angle of the drawbar.
For reference, the CRAFTSMAN Garage Door Opener Owner’s Manual provides excellent visual schematics on how these two pieces bolt together using a clevis pin and ring fastener.
Safety Steps Before Starting Your Garage Door Opener Arm Adjustment
Before you touch a single bolt, you must prioritize safety. Garage doors are the largest moving objects in most homes, and their spring systems operate under extreme, life-threatening tension. In fact, misaligned doors and improper adjustments contribute to up to 30,000 injuries annually.
Follow these safety steps before beginning:
- Disconnect the Power: Unplug the garage door opener from the ceiling outlet to prevent anyone from accidentally activating it via remote or keypad.
- Pull the Emergency Release Cord: Pull the red emergency release handle to disconnect the trolley from the opener carriage.
- Perform a Door Balance Test: Manually lift the door halfway and let go. The door should hover in place, supported entirely by its springs. If it falls or shoots upward, your springs are out of balance. Do not attempt to adjust the arm on an unbalanced door—call a professional immediately.
Adjusting the Arm Length and Bracket Positions
Once you have verified the door is balanced and the power is off, you can proceed with the physical adjustment:
- Loosen the Connection: Remove the bolts holding the straight and curved arm sections together.
- Determine the Right Length: To fix a steep angle, you generally need to lengthen the arm assembly by selecting bolt holes that are further apart. To fix a shallow angle, shorten the arm assembly. Always select holes that are as far apart as possible to maximize the rigidity of the arm.
- Reposition the Door Bracket (If Needed): If adjusting the arm length isn’t enough, you may need to move the door bracket itself. Ensure it is mounted securely to a reinforced vertical stile on your door panel. If you have a lightweight fiberglass or non-reinforced steel door, we highly recommend installing an Opener Reinforcement Bracket (ORB) to distribute the force and prevent the panel from buckling.
- Consider the Header Bracket: If you have low headroom, simply lengthening the arm might cause the trolley to collide with the opener housing. In this case, you may need to lower the header bracket on the wall above the door to maintain a 2-inch clearance above the highest point of travel.
If you find that your existing brackets or fasteners are stripped or damaged, you can find high-quality replacements in our guide on garage door repair and replacement parts.
Resetting Travel Limits and Force Settings After Adjustment
Whenever you alter the physical geometry of the garage door arm, you change the distance the trolley must travel to open and close the door. If you skip this step, the opener will try to push the door further than it physically can go, causing immediate damage to your new adjustments.
Over 70% of garage door safety incidents are linked to improper force and travel limit settings. To adjust these safely:
- Locate the Adjustment Screws: On the back or side of your opener motor, locate the limit adjustment screws (typically marked “UP” and “DOWN”). On older models, these are plastic screws; on modern models, they are digital buttons.
- Understand the Measurements: As noted in the LiftMaster 3240 1/2 HP Manual, one full turn of a limit adjustment screw equals roughly 2 inches of door travel.
- Set the Limits: Adjust the screws in small increments. Turn the DOWN limit screw clockwise to decrease downward travel if the door is slamming or reversing upon hitting the floor.
- Test the Force Settings: Once the travel limits are set, test the safety reversal system. Place a 1.5-inch wood block (like a 2×4 laid flat) on the floor under the path of the door. Close the door. It must reverse immediately upon striking the wood. If it doesn’t, reduce the downward force setting on the motor until it passes this test.
If you are dealing with an older opener that lacks modern auto-reverse safety features, it is highly recommended to upgrade to a modern unit. You can explore your options through our professional garage door opener installation services.
Frequently Asked Questions about Garage Door Arms
What is the optimal angle for a garage door opener arm?
The optimal angle for a J-arm is approximately 45 degrees when the garage door is in the fully closed position. This angle provides the perfect balance of mechanical leverage, allowing the trolley to pull the door both upward and backward simultaneously. If the arm is too vertical, it forces the door straight down into the floor; if it is too horizontal, the motor has to work twice as hard to get the door moving.
Can a bad arm angle cause my garage door panel to buckle?
Yes, absolutely. A steep arm angle directs the motor’s immense vertical force straight down into the top door panel instead of translating it into backward motion. Over time, this concentrated downward pressure will cause the top panel to bend, crease, or buckle. This is especially common on non-reinforced steel, aluminum, or fiberglass doors. To prevent this, always ensure the arm is properly angled and install an opener reinforcement bracket across the top panel’s center stile.
When should I lower the header bracket instead of lengthening the arm?
You should lower the header bracket when you have low headroom clearance and lengthening the arm would cause the trolley to collide with the opener chassis or the travel limit stop bolt. Lowering the header bracket (while maintaining at least 2 inches of clearance above the door’s highest travel point) improves the arm’s angle without sacrificing the door’s overall travel range.
Conclusion
Taking the time to check and perform a garage door opener arm adjustment is one of the most effective ways to protect your home. Regular adjustment of the garage door arm can reduce repair costs by an average of 40% and keep your system operating quietly for years to come.
However, working with heavy garage doors and high-tension springs carries inherent risks. If you are uncomfortable adjusting the mechanical geometry yourself, or if you suspect your door is out of balance, the team at Matrix Garage Doors is here to help.
We are a family-owned company based in Columbus, OH, offering 24/7 emergency residential garage door repair, installation, and maintenance. Whether you need a quick adjustment in Westerville, a repair in Blacklick, OH, or a complete system tune-up in Dublin, OH, our experienced technicians are ready to provide prompt, professional service.
Don’t let a misaligned arm ruin your opener. Contact us today via Matrix Garage Doors Services to schedule your professional inspection!
Additional Resources & Guides:
- For general automation tips, see The Lazy Persons Guide to Automatic Roll Up Garage Door Openers or Upgrade Your Access with a Replacement Garage Keypad or Remote.