The Ultimate Guide to Garage Door Frame Installation and Layout
Why Proper Garage Door Frame Installation Makes or Breaks Your Garage Door
Garage door frame installation is the foundational step that determines whether your garage door operates smoothly, seals tightly, and lasts for decades — or causes endless headaches.
Here’s a quick overview of how it works:
- Measure the rough opening — typically 3 inches wider and 1.5 inches taller than the door itself
- Install the header — a load-bearing horizontal beam across the top of the opening
- Set the king and jack studs — vertical supports on each side of the opening
- Attach the jambs — the finished vertical guides the door runs against
- Check level, plumb, and square — at every stage, before moving on
- Weatherproof the frame — caulk, flashing, and vinyl stop molding protect against the elements
The frame is the structural backbone of your entire garage door system. Get it right, and your door glides quietly and seals tightly for years. Get it wrong, and you’re looking at misalignment, drafts, rot, and costly repairs down the road. In fact, poorly framed openings are linked to 15–20% of service calls for doors that run off-track.
I’m Andrew Hopson from Matrix Garage Doors, a residential garage door company serving homeowners across the greater Columbus, Ohio area — and garage door frame installation is one of the core services our team handles every day. In this guide, I’ll walk you through everything you need to know to frame a garage door opening correctly, whether you’re tackling it yourself or just want to understand the process before calling a pro.

Understanding the Components of garage door frame installation
Before we pick up a hammer, we need to speak the language of framing. A garage door frame isn’t just a simple box; it is a complex assembly designed to hold hundreds of pounds of moving steel or wood while supporting the weight of the wall above it.
The Structural Backbone: Header, Studs, and Jambs
The header is the “unsung hero” of the project. This horizontal beam sits across the top of the opening. Its job is to support the structural load from the roof or the second floor and distribute that weight to the vertical supports. For a standard double-car garage in 2026, we typically see headers made of doubled 2x12s or even Laminated Veneer Lumber (LVL) for extra-wide spans.
Supporting the header are the king studs and jack studs. The king stud runs from the floor plate all the way to the top plate of the wall. The jack stud (sometimes called a trimmer) is nailed to the king stud but stops at the bottom of the header, acting as a shelf for the header to sit on.
Finally, we have the jambs. These are the vertical boards that form the finished “face” of the opening. They are usually made of 2×6 lumber and provide the flat surface where the garage door tracks are mounted. According to A Practical Guide to Framing for a Garage Door, ensuring these components are perfectly plumb is the difference between a door that glides and one that grinds.
Load-Bearing Walls and Structural Integrity
In most Columbus garages, the wall with the door is a load-bearing wall. This means you can’t just cut a hole and slap in some wood. You must ensure the header is sized correctly for the span. If a header sags, it will pinch the door, causing the motor to burn out or the door to jump the tracks. We always recommend checking the “crown” of your lumber—the slight natural curve in the wood—and ensuring it faces upward so that as the house settles, the header levels out rather than sagging.
Rough Opening vs. Finished Opening Dimensions
One of the most common mistakes we see is confusion between “rough” and “finished” openings.
- Rough Opening: This is the “hole” in the wall framing before the jambs are installed. To allow for the thickness of the jamb material and a little “wiggle room” for leveling, we typically frame the rough opening 3 inches wider than the door and 1.5 inches taller.
- Finished Opening: This is the final space once the 2×6 jambs are attached. This should match the actual size of the garage door (e.g., a 16×7 door needs a 16×7 finished opening).
| Door Size | Rough Opening Width | Rough Opening Height | Finished Opening |
|---|---|---|---|
| 8′ x 7′ (Single) | 8′ 3″ | 7′ 1.5″ | 8′ x 7′ |
| 9′ x 7′ (Single) | 9′ 3″ | 7′ 1.5″ | 9′ x 7′ |
| 16′ x 7′ (Double) | 16′ 3″ | 7′ 1.5″ | 16′ x 7′ |
Essential Materials for garage door frame installation
Quality materials are non-negotiable. For any wood touching concrete (like the sill plate or the bottom of the jambs), you must use pressure-treated lumber to prevent rot and termite damage. For the rest of the vertical studs, standard SPF (Spruce-Pine-Fir) wood is the industry standard.
You’ll also need:
- Fasteners: 3-inch or 3.5-inch framing nails or high-quality screws.
- Galvanized Nails: Use these for any pressure-treated wood to prevent corrosion.
- Adhesive: Construction adhesive helps “sandwich” header boards together for maximum strength.
- Shims: For fine-tuning the levelness of the jambs.
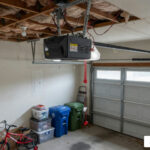
If you are also planning on automating your door, you’ll want to ensure your framing includes a solid center block for the spring system. You can find more info about garage door opener installation on our specialized guide.
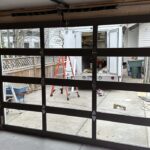
Step-by-Step Guide to the Goal Post Framing Technique
At Matrix Garage Doors, we highly recommend the “Goal Post” framing technique. It’s the most reliable method for ensuring the tracks have a solid surface to mount to. It involves running two vertical 2x6s from the floor all the way to the ceiling (the “posts”) and a horizontal header between them.
Measuring and Preparing the Opening
Precision is key. We often say “measure three times, cut once” when it comes to garage doors. Use a 6-foot level to check if your garage floor is level. If one side of the floor is lower, you’ll need to account for that when cutting your jambs so the top header remains perfectly horizontal.
Mark your centerline on the floor and the header area. This helps align the garage door installation services later, especially when centering the torsion spring bracket.
Installing the Header and Jambs
- Build the Header: Sandwich two 2x12s with a piece of 1/2-inch plywood in between. This creates a beam that is 3.5 inches thick—matching the width of your 2×4 wall studs.
- Set the Posts: Install your king studs from floor to ceiling.
- Install Jack Studs: Nail these to the king studs. Their height should be exactly the height of your finished door.
- Place the Header: Lift the header onto the jack studs and secure it.
- Attach the Jambs: Nail your 2×6 jambs to the inside of the rough opening. Use shims to ensure they are plumb (vertically straight) and level.
As noted in How to Frame a Garage Door, skipping the level check at this stage is the #1 cause of doors that have gaps on one side when closed.
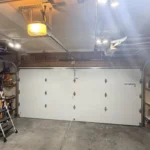
Clearances, Weatherproofing, and Rotted Jamb Repair
A frame isn’t just about the hole; it’s about the space around the hole. You need to account for three types of clearance:
- Sideroom: You need at least 3.75 inches on each side for the vertical tracks.
- Headroom: Standard tracks need 12 inches of space above the door. If you have a garage door opener, you’ll want 15–18 inches.
- Backroom: This is the distance the door travels into the garage. Usually, this is the door height plus 18 inches.
Weatherproofing for Energy Efficiency
In Ohio, our winters are no joke. A poorly sealed frame can let in drafts that make your heating bill skyrocket.
- Flashing: Install metal flashing above the header to direct water away from the wood.
- Caulk: Apply a heavy bead of exterior-grade caulk where the jamb meets the siding or brick.
- Vinyl Stop Molding: This is the trim with a flexible rubber flap that pushes against the outside of the door. It acts as the primary seal against wind and rain.
Replacing Rotted Jambs and Preventing Future Decay
If you’re reading this because your current frame looks like Swiss cheese, you aren’t alone. Moisture often wicks up from the bottom of wooden jambs. When we perform garage door repair services, we often replace rotted wood with composite materials or pressure-treated lumber wrapped in aluminum.
Pro Tip: Leave a 1/4-inch gap between the bottom of the wooden jamb and the concrete floor, then fill it with sealant. This prevents the wood from “drinking” standing water.
Avoiding Common Mistakes in garage door frame installation
We’ve seen it all—from headers held up by literal “thoughts and prayers” to frames so crooked the door looked like a diamond rather than a rectangle. Here are the pitfalls to avoid:
- Using the Wrong Fasteners: Don’t use drywall screws for framing. They are brittle and will snap under the weight of a 400-pound door. Use 16d sinkers or structural screws.
- Ignoring the Spring Pad: The center of the header needs extra reinforcement (usually a 2×6 block) because that is where the torsion springs exert massive force.
- Out-of-Plumb Studs: If your studs lean even half an inch, your tracks won’t be parallel. This causes the rollers to bind and eventually pop out.
- Safety First: Never attempt to adjust or frame around high-tension springs without professional tools. They store enough energy to be lethal if they snap.
Frequently Asked Questions about Garage Door Framing
Is DIY garage door framing suitable for beginners? If you are comfortable with a circular saw, a 6-foot level, and basic framing math, you can handle a single-door frame. However, for double doors (16ft+) or load-bearing walls, the structural risks are high. DIY material costs typically range from $200 to $500, but a mistake that requires a pro to fix can double that cost.
How much does it cost to frame a garage door opening in 2026? While material costs are around $200–$500, professional labor for garage door frame installation usually adds $300 to $800. While it’s an investment, the ROI comes in the form of a door that lasts 20–30 years rather than 10. A pro can usually finish the job in a single day, whereas a DIYer might take a full weekend.
Do I need a permit for garage door framing? In most of our service areas like Dublin, Westerville, and Upper Arlington, any structural change to a load-bearing wall requires a permit. Replacing a rotted jamb usually doesn’t, but creating a new opening definitely does. Always check with your local Columbus building authority to ensure you’re up to code.
Conclusion
Framing is the foundation of everything we do at Matrix Garage Doors. Whether you’re in Bexley, Hilliard, or New Albany, a perfectly square and sturdy frame is the secret to a garage door that you never have to think about—it just works.
As a family-owned company with over 20 years of experience in the Columbus, OH area, we pride ourselves on precision. We offer 24/7 emergency service and professional installation that we stand behind. If you’ve looked at your rough opening and decided it’s a bit more than you want to tackle this weekend, give us a call. We’ll get it framed, hung, and sealed so you can get back to what matters.
For more information, explore more info about our garage door services or contact us for a free estimate today!