Replace garage door spring: Easy Guide 2025
Why Garage Door Spring Replacement Matters for Columbus Homeowners
Replace garage door spring safely by understanding the risks, gathering the right tools, and following precise steps—or by calling a professional when in doubt.
Quick Answer for Replacing a Garage Door Spring:
- Disconnect the opener and secure the door with C-clamps
- Measure your old spring (wire size, inside diameter, length)
- For torsion springs: Unwind the old spring with winding bars, remove it, install the new one, and wind it 7.5-8.5 turns
- For extension springs: Open and secure the door, remove the old spring and safety cable, install the new spring, and thread a new safety cable
- Test the balance by lifting the door halfway—it should stay in place
- Call a professional if you feel unsafe or lack proper tools
That loud bang from your garage wasn’t your imagination. It was likely a garage door spring breaking—one of the most common and dangerous failures homeowners face. Garage door springs do the heavy lifting for your 150-300 pound door. When one breaks, the door is nearly impossible to lift manually, and using the automatic opener can damage the motor or cause the door to crash down.
There are two main types of garage door springs:
- Torsion springs mount horizontally above the door and use torque to lift it
- Extension springs run along the sides of the door and stretch to provide counterbalance
Both types are under extreme tension and can cause severe injury or death if handled incorrectly. The average spring lasts about 10,000 cycles (7-10 years). When one breaks, it’s best to replace both for balanced operation.
While the DIY route can save on the $200-$400 national average cost for professional replacement, the risks are serious. In my 30 years in the industry, I’ve seen injuries from broken bones to lost fingers. This guide will walk you through how to replace garage door spring systems safely, but we’ll also tell you when to call a pro.
I’m Andrew Hopson of Matrix Garage Doors. My team and I have helped hundreds of Columbus homeowners safely replace garage door spring systems, and we know what it takes to do this repair without injury.
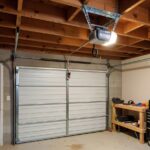
 versus extension springs (mounted along the side tracks, stretching and contracting to counterbalance the door weight), with labeled diagrams of each system and arrows indicating direction of force - Replace garage door spring infographic")
Before You Start: Safety, Tools, and Diagnosis
Before you touch those highly-tensioned coils, it’s crucial to understand the risks and gather the right equipment. Our goal is to ensure you stay safe and get the job done right the first time.
The Unmistakable Signs of a Broken Spring
Your garage door will give you clear signs when a spring fails. Here’s what to look for:
- Loud Bang from Garage: This sound, often like a gunshot, is the most obvious sign of a spring snapping.
- Garage Door Feels Heavy: The door becomes incredibly heavy (150-300 lbs) and difficult to lift manually because the spring is no longer counterbalancing the weight.
- Door Opens Unevenly or Crooked: The door opens at an angle or looks lopsided, indicating one of two springs has failed and created an imbalance.
- Garage Door Opener Strains: The opener motor struggles or makes grinding noises as it tries to lift the door’s full weight. Continuing to use it can burn out the motor.
- Visible Gap in the Spring: You can see a clear gap of several inches in a torsion spring, or a stretched-out coil on an extension spring.
- Slack or Loose Cables: The lift cables connected to the springs hang loosely or even fall off their pulleys.
Ignoring these signs can lead to further damage and create a dangerous situation.
The Dangers of DIY Spring Replacement & Why Safety is Non-Negotiable
We can’t stress this enough: garage door spring replacement is one of the most hazardous DIY tasks. The springs store immense kinetic energy, ready to release uncontrollably if mishandled.
- Extreme Tension and Stored Kinetic Energy: If this energy is released unexpectedly, winding bars or spring fragments can become deadly projectiles. We’ve seen severe injuries, including lost fingers, deep lacerations, and broken bones from failed DIY attempts.
- Risk of Severe Injury: Winding bars can whip around with incredible force, causing devastating injuries.
- Property Damage: An uncontrolled spring release can also damage your car or garage.
- Importance of Safety Glasses: Always wear safety glasses to protect your eyes from flying debris.
- Importance of Gloves: Protect your hands from sharp edges and pinching.
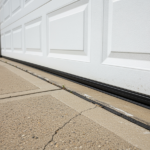
- Securing the Door with C-Clamps: Before working on the springs, you must secure the garage door in the open position with C-clamps or vise-grips on the vertical tracks to prevent it from crashing down.
While saving money is tempting, the risk of serious injury often outweighs the savings. Professional service is the safest route for most homeowners.
Gathering Your Tools and the Correct New Spring
If you proceed with a DIY garage door spring replacement, having the right tools and correct springs is non-negotiable.
Essential Tools You’ll Need:
- Winding Bars (NOT screwdrivers): Two solid steel winding bars (1/2″ or 5/8″ diameter, 18″ long) are essential. Never use screwdrivers or other tools; they can slip and cause catastrophic injury.
- Socket Wrench Set
- Adjustable Wrench
- Vise-Grips (two 10″ recommended)
- Sturdy Ladder
- Safety Glasses and Gloves
- Ruler or Tape Measure
- File and Marker/Chalk
- Flashlight or Good Lighting
How to Measure Old and New Springs Accurately:
Using the wrong spring leads to door imbalance, opener damage, and major safety risks. While springs are often color-coded for weight capacity, direct measurement is the most reliable method.
You need four key measurements:
- Wire Size: Measure 20 coils of the spring wire. Divide that measurement by 20. For example, if 20 coils measure 4 inches, your wire size is 0.200 inches.
- Inside Diameter (ID): This is the spring’s opening, typically 1-3/4″ or 2″ for residential doors.
- Spring Length: Measure the entire length of the unwound spring from end to end.
- Wind Direction: Note if the spring is left-wound or right-wound. Torsion springs come in pairs and must be installed on the correct side.
It’s also crucial to know the weight of your garage door. If you’re unsure about the old springs, weighing the door is the most precise way to determine the correct spring tension needed.
How to Replace Garage Door Spring Systems: A Step-by-Step Guide
Now that we’ve covered safety and gathered our tools, let’s dive into the replacement process for both spring types. Focus on safety with every single step.
Step-by-Step: How to Replace a Torsion Spring
Torsion springs are the more complex and dangerous type to replace. Proceed with extreme caution.

- Safety First: Unplug and Secure. Unplug the garage door opener or flip the circuit breaker. Open the door fully and secure it with two C-clamps or vise-grips on the vertical tracks, just below the bottom roller. This prevents the door from slamming shut.
- Mark the Shaft and Drums. Use a marker to draw a line across the torsion shaft and cable drums for realignment. Mark the shaft beyond the winding cone as a final check.
- Prepare for Unwinding. Locate the winding cone on the spring’s end. Loosen the two set screws slightly.
- Carefully Unwind the Old Spring.
- Insert a winding bar firmly into a winding cone hole.
- While holding the bar securely, loosen the two set screws about 1/4 turn each.
- Insert the second winding bar into the next hole.
- Slowly unwind the spring by rotating the bars. Always keep at least one bar in the cone, maintaining firm control.
- Count each quarter turn. Most 7-foot doors require about 30 quarter turns (7.5 full turns) to unwind, while 8-foot doors need about 34 (8.5 full turns).
- Once fully unwound, remove the bars.
- Loosen Torsion Hardware. Remove the set screws from the winding cone. Loosen the bolts on the center stationary cone and the cable drums.
- Remove Old Spring. Slide the cable drums outwards, then slide the old spring(s) off the torsion shaft.
- Slide on New Spring(s). Slide the new spring(s) onto the shaft, ensuring the left-wound spring is on the left and the right-wound on the right (often marked “L” or “R”).
- Reinstall Hardware. Reattach the center stationary cone. Slide the cable drums back, ensuring cables are seated in their grooves. Secure the drums.
- Winding the New Spring(s). This is the most dangerous step.
- Tighten the winding cone’s set screws enough to hold the spring.
- Insert a winding bar and begin winding the spring upwards, counting each quarter turn. Aim for 30 quarter turns (7.5 full turns) for a 7-foot door or 34 quarter turns (8.5 full turns) for an 8-foot door.
- Always keep one bar fully inserted and under control.
- Stretching the Spring: After winding, stretch the spring 1/8″ to 1/4″ by tapping the winding bar. This prevents binding.
- Once wound, hold the tension with the bars and firmly tighten the two set screws on the winding cone.
- Repeat for Second Spring (if applicable). Repeat the winding process for the second spring.
- Final Checks. Remove the winding bars. Check that all set screws are tight and cables are aligned.
For a scholarly introduction to torsion springs and for more information on how to install them I recommend you visit Richard Kinch’s page,”How I Replaced Deadly Garage Door Torsion Springs and Lived to Tell the Tale.”
Step-by-Step: How to Replace an Extension Spring
Extension springs are still under extreme tension and dangerous if they snap. Always use safety cables.
- Safety First: Unplug the Opener.
- Open and Secure the Door. Open the garage door fully and secure it with C-clamps on the vertical tracks to relieve spring tension.
- Remove Old Spring. Detach the spring from the pulley and the hanger bracket. Unthread the safety cable if present.
- Remove Safety Cable. Remove the old safety cable from the track and eye bolt.
- Install New Spring. Attach the new spring to the hanger bracket and the pulley.
- Thread Safety Cable. Thread a new safety cable through the center of the new spring. Secure both ends of the cable. This prevents the spring from flying across the garage if it breaks.
- Repeat for the Other Side. Repeat the process for the spring on the other side.
- Check Door Balance. Remove the C-clamps and manually test the door. It should move smoothly and stay put when lifted halfway.
For more information on other common issues and solutions, explore our comprehensive More info about our garage door repair services.
After the Replacement: Fine-Tuning and When to Call a Pro
You’ve replaced your springs, but the job isn’t quite done. These final steps ensure smooth, safe operation. We’ll also review when it’s best to call a professional.
Fine-Tuning and Long-Term Spring Maintenance
- Testing Door Balance: This is the ultimate test of your garage door spring replacement. With the opener unplugged, lift the door halfway. It should stay in place.
- If the door falls, the springs are too weak; add more tension (1/4 turn at a time for torsion springs).
- If the door rises, the springs are too strong; remove tension (1/4 turn at a time).
- Make small adjustments and retest after each one.
- Lubricating Springs: Apply a silicone-based lubricant or 40 wt. motor oil to your torsion springs to reduce friction and prevent rust. Avoid lubricating the last inch near the winding cones. Lubrication can significantly extend spring life.
- Regular Inspections: Inspect your springs, cables, rollers, and tracks monthly to catch problems early. Our Garage Door Maintenance Tips provide more detail.
- Extending Spring Lifespan: Regular lubrication and keeping the system clean and balanced will help your springs reach their maximum 10,000-cycle lifespan. You can find more insights on maintaining your entire garage door system by Conductingroutine inspections of the garage doorand its components can help identify potential issues before they escalate..
When to Skip the DIY and Call a Professional
While this guide provides detailed steps, we believe calling a professional is the safest choice for many homeowners.
- Feeling Unsure or Unsafe: If you feel uncomfortable or intimidated by the power of the springs, stop immediately. Your safety is paramount.
- Lacking Proper Tools: Using improper tools, like screwdrivers instead of winding bars, is incredibly dangerous.
- Complex Spring Systems: Systems like Wayne Dalton Torquemaster or EZ-Set require specialized knowledge.
- If the Door is Still Unbalanced: If the door still won’t balance correctly, a professional can diagnose the issue safely.
- Professional Cost Range: A professional replacement typically costs $200-$300. High-cycle springs might run $400-$600, and converting from extension to torsion springs costs $380-$500. Considering the risks, this investment is often worth the peace of mind.
- Why Professional Service Matters: Our team at Matrix Garage Doors serves Columbus, OH, and areas like Dublin, Westerville, and Hilliard. With two decades of experience, we use specialized tools and guarantee a safe, correct job with a warranty. One client’s delay turned a standard $300-$350 spring repair into a $500+ job due to additional damage. Calling a pro can prevent costly mistakes.
For expert assistance with your garage door spring replacement, contact us. We offer 24/7 emergency repair across Columbus. Learn more at Garage Door Repair in Columbus, OH.
Frequently Asked Questions about Garage Door Spring Replacement
We often hear similar questions from homeowners about garage door springs. Here are the most common ones.
How long do garage door springs last?
The average lifespan is about 10,000 cycles, or seven to ten years of regular use. A “cycle” is one opening and closing. Heavy use, lack of lubrication, and extreme weather can shorten this lifespan. High-cycle torsion springs, which can cost between $400 and $600, may last up to twice as long.
Can I replace just one spring if I have two?
We strongly advise against it. Springs wear out at the same rate. If one breaks, the other is likely near failure. Replacing only one creates an unbalanced door, as the new spring will be stronger. This imbalance stresses the opener and other parts, leading to more expensive repairs. For safety and performance, always replace both springs.
What happens if I use the wrong size spring?
Using the wrong spring creates serious problems and safety risks:
- Door Imbalance: If the spring is too strong, the door will be hard to close. If it’s too weak, the door will be heavy and fall too quickly, straining the opener.
- Damage to Garage Door Opener: An incorrect spring forces your opener to work too hard, leading to motor burnout.
- Excessive Wear on Parts: The imbalance causes accelerated wear on cables, pulleys, and rollers.
- Safety Risk: An unbalanced door can fall unexpectedly or fly up, causing injury or damage.
Always ensure you have the correct spring measurements (wire size, inside diameter, and length) to match your door’s weight. When in doubt, consult a professional.
Your Garage Door is Back in Action
Completing a garage door spring replacement is a significant achievement that demands meticulous attention to safety. We’ve walked through the critical steps, emphasized the dangers, and highlighted the importance of proper tools and measurements.
The goal is a safe, smoothly operating garage door. While DIY can be rewarding, knowing when to call in the experts is a sign of smart homeownership. For expert assistance with your Garage Door Services and Repairs, our team at Matrix Garage Doors is ready to help. We are a family-owned company in Columbus, OH, offering 24/7 emergency repair, installation, and maintenance across all our service locations, including Dublin, Worthington, and Hilliard.
Don’t let a broken spring get you sprung—reach out to us for reliable garage door repairs today!